
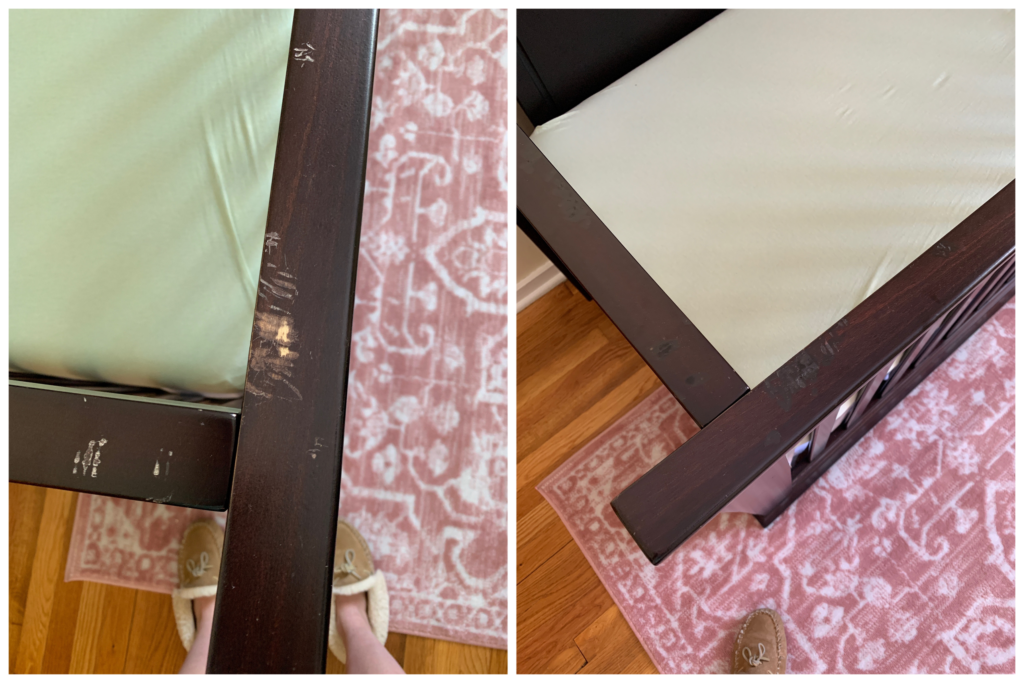
Over the weekend I went on Instagram stories to show our DIY on how we were restoring a beat up crib that was gifted to us by wonderful friends! It worked out so well that I figured I’d put together a blog post just in case anyone else was in a similar situation. Receiving a gifted, used, crib was pivotal in keeping us in a reasonable budget, but that doesn’t mean we didn’t want something that looked new! Let’s start with a few “before” photos.

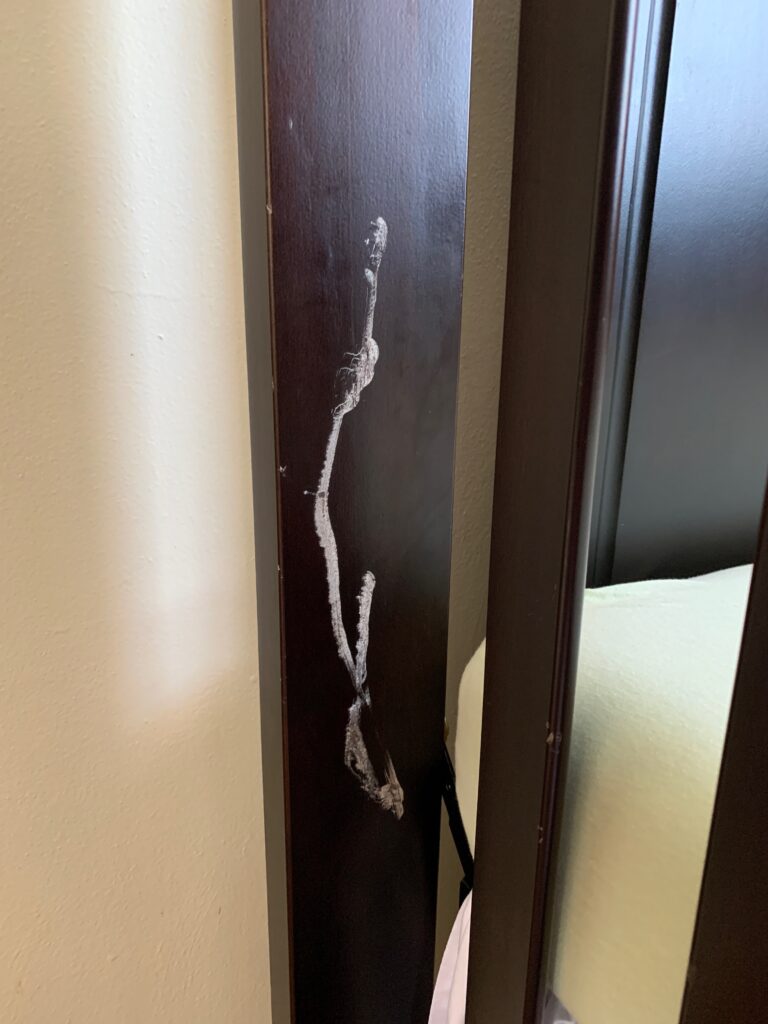
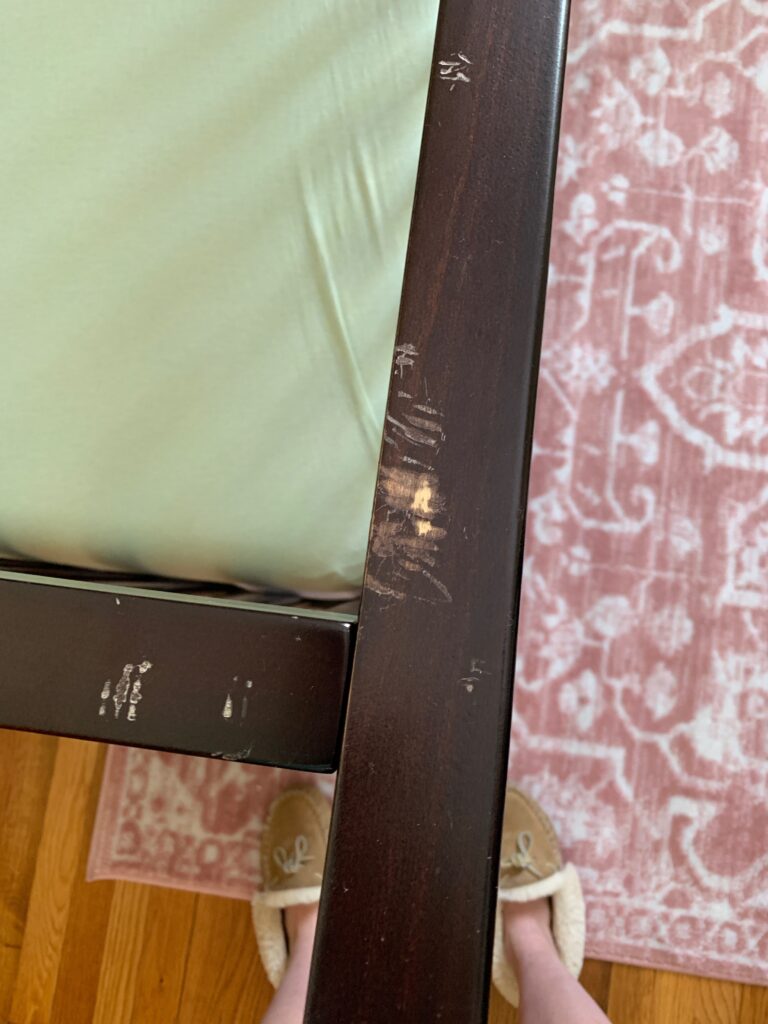
These were the three worst spots that I really wanted to help disguise. The crib is in great shape, just a few scratches. I had tossed around painting the entire crib, but that seemed like too much work. I had also thought about standing it down to a more natural look, but we weren’t 100% sure what would be under the paint/stain. Instead, we decided it just needed a few touch ups.
This post contains affiliate links. Click here to view my disclosure policy.
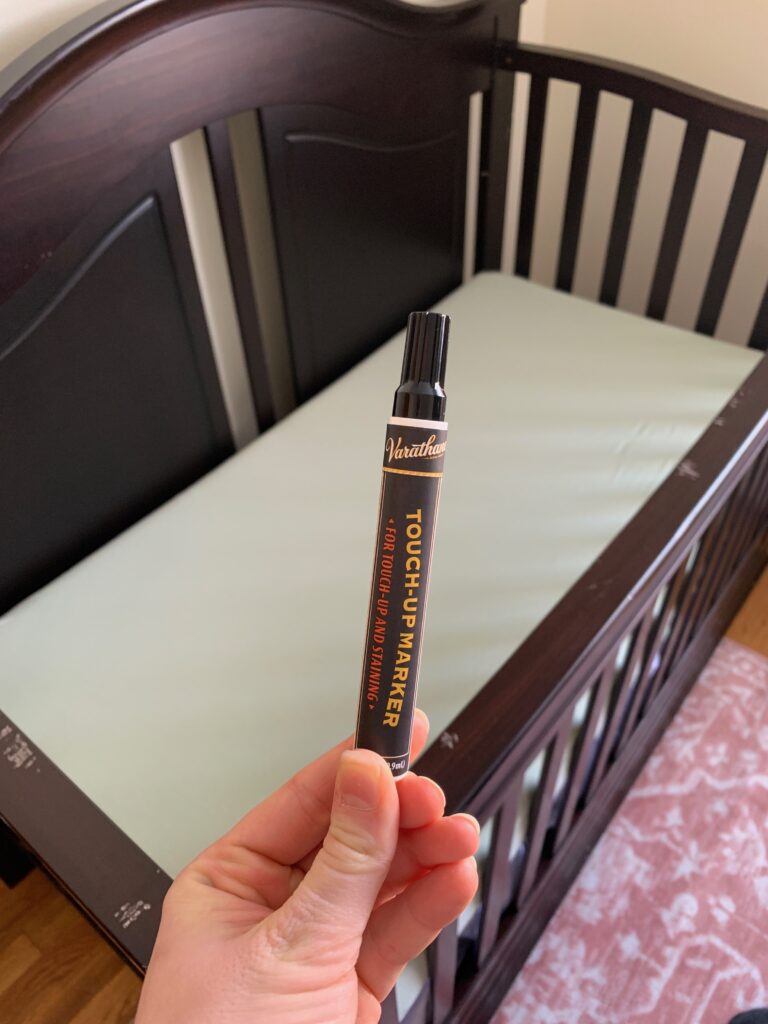
We decided we were going to try using this touch-up marker just on the spots that were scratched. Let me start by saying this is not a sponsored post and we had no idea if this crazy idea was going to work. However, for less than $6, it was worth a try!
The very first thing I did was clean the entire crib really well with this wood cleaner. I received mine in my most recent Grove order. I love the almond scent!

A little warning, this marker does give off a faint stain smell. It isn’t nearly as bad as a can of stain, but just to be safe my husband did a lot of the work. Make sure you fully shake the marker and then press the tip down to allow stain to filter down. Next, color away at the dents and dings!

Watch the imperfections fade away before your eyes! Seriously, it’s that easy! Let’s show some before and after shots.
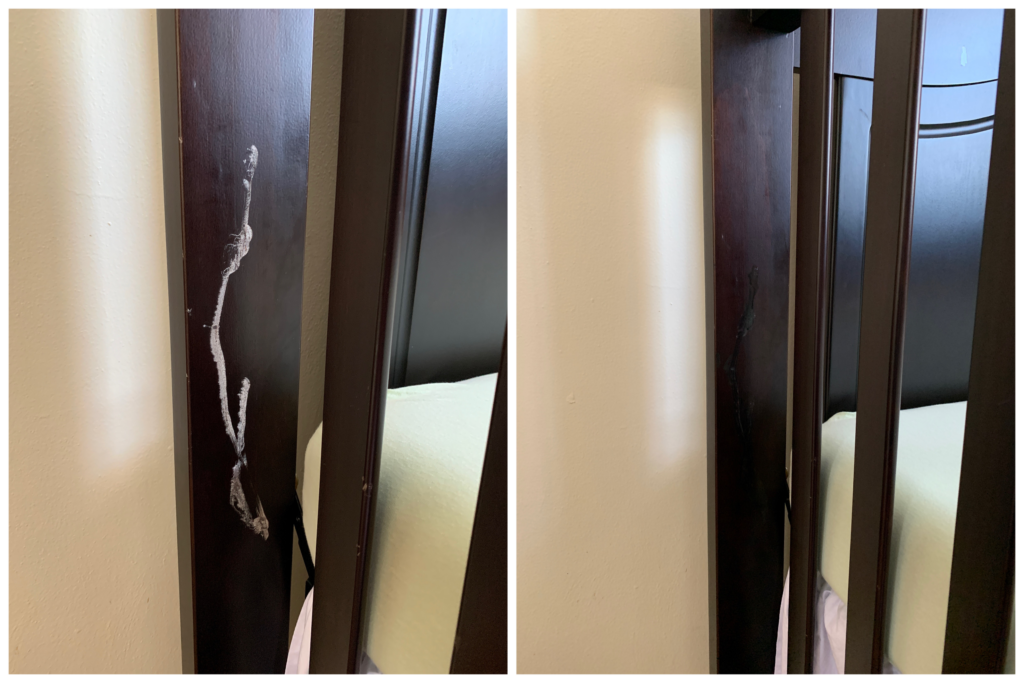
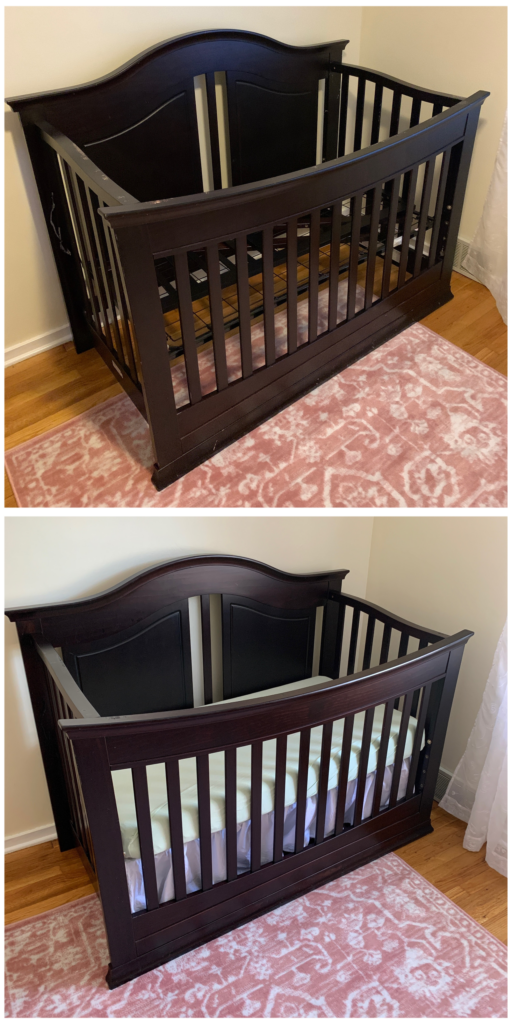
So much better, right?? If you look closely you can still see the indentations, but most would never even notice. When I posted this before and after to my stories, reviews from my followers were mixed. Some were very excited for us and others had a few opinions about our choice. Here’s what I heard the most.
“That won’t be safe once she starts biting on it.”
Ok so you aren’t wrong. Here’s the deal: stain is a chemical compound that is not safe for consumption. This touch-up stain has plenty of time to dry and will not let off fumes once she arrives. And if she starts biting, we will get a bumper guard. If she puts her mouth on the rails, it will still be just as safe as if she were to lick our coffee table.
UPDATE as of 3/10/22:
Emery is 22 months old now and has never tried biting the railings of this crib. There are no new bite marks. As I mentioned above, had she been a crib biter, I would have invested in a rail cover like THIS ONE.
This $6, 5 minute DIY was well worth it. Make sure to check back the blog next week to see my vision for how I plan to finish this room. I’ll include furniture, accent pieces and a mood board. This is just so fun designing a nursery for our sweet, baby girl! I hope you enjoyed our restoring of a beat up crib!

Great content! Super high-quality! Keep it up! 🙂
Thank you!
Helpful info. Lucky me I found your web site accidentally, and I’m surprised why this twist of fate did not came about earlier! I bookmarked it.
Thank you 🙂